rareout
Active member
- Aug 16, 2019
- 291
- 66
- 28
Open up Cloudflare’s dashboard and login with the credentials which are displayed on your Siteground account (you can find them here: open the new Site Tools -> Speed -> Cloudflare -> scroll to the bottom)
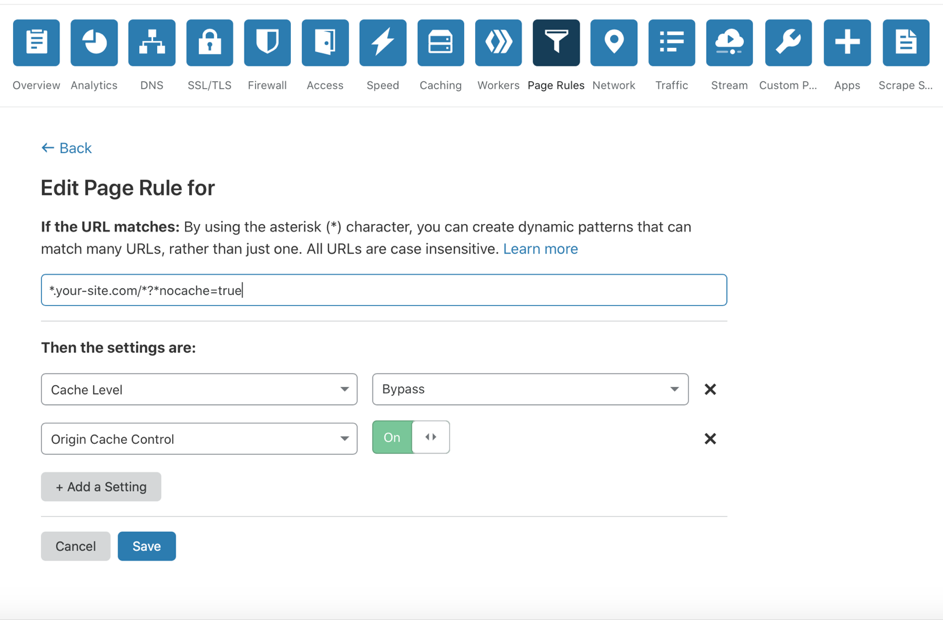
2. On Cloudflare’s dashboard click on page rules -> create page rule -> for the URL enter: *.your-site.com/*?*nocache=true (ONLY EDIT „your-site.com“, be aware of the points and stars, otherwise it won’t work)-> add a setting „Cache Level“ to „bypass“ -> add another setting „Origin Cache Control“ to „ON“ -> click on save

3. If you never created a worker before click on the Cloudflare logo (or visit https://dash.cloudflare.com/ ) and on the right side you find „WORKERS Build server less applications“ click on it and you will need to go through a setup process.

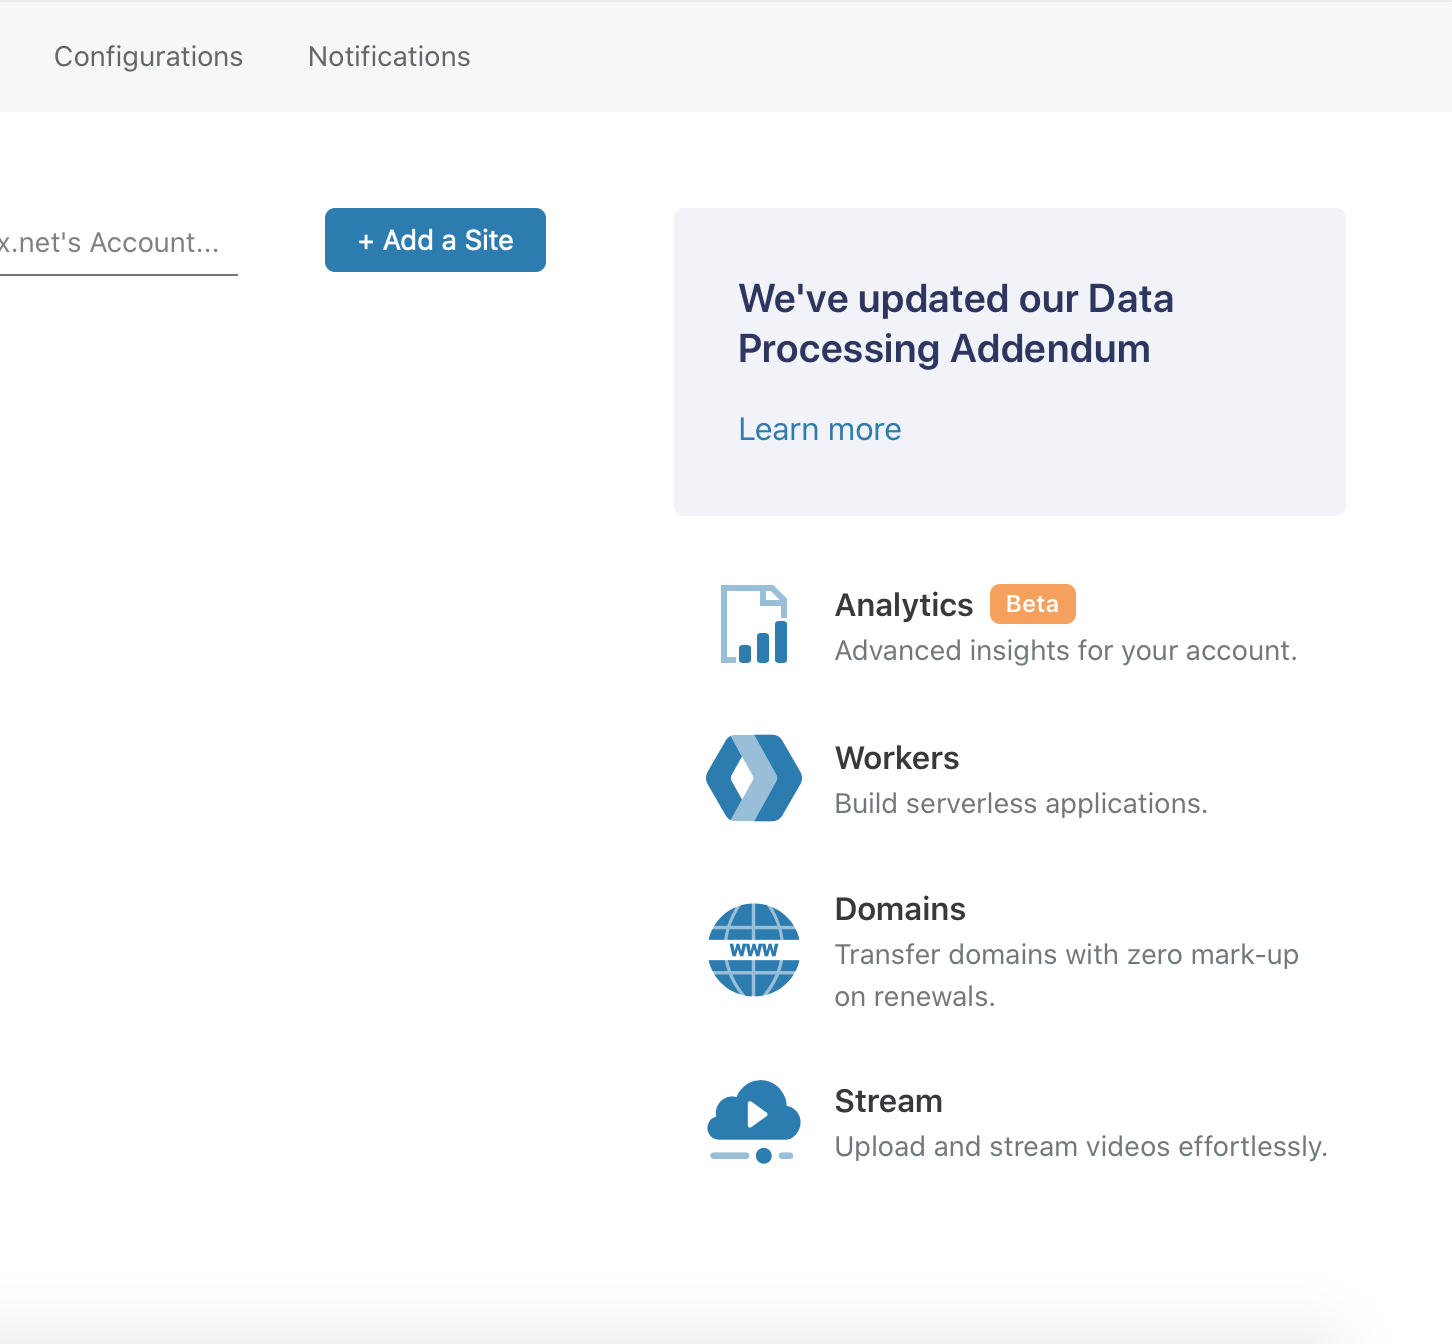
The „workers.dev“ URL doesn’t matter, you can name this worker whatever you feel like. Now you should see a screen like this. (IF not please comment below and I will rewrite this part of the instruction.)

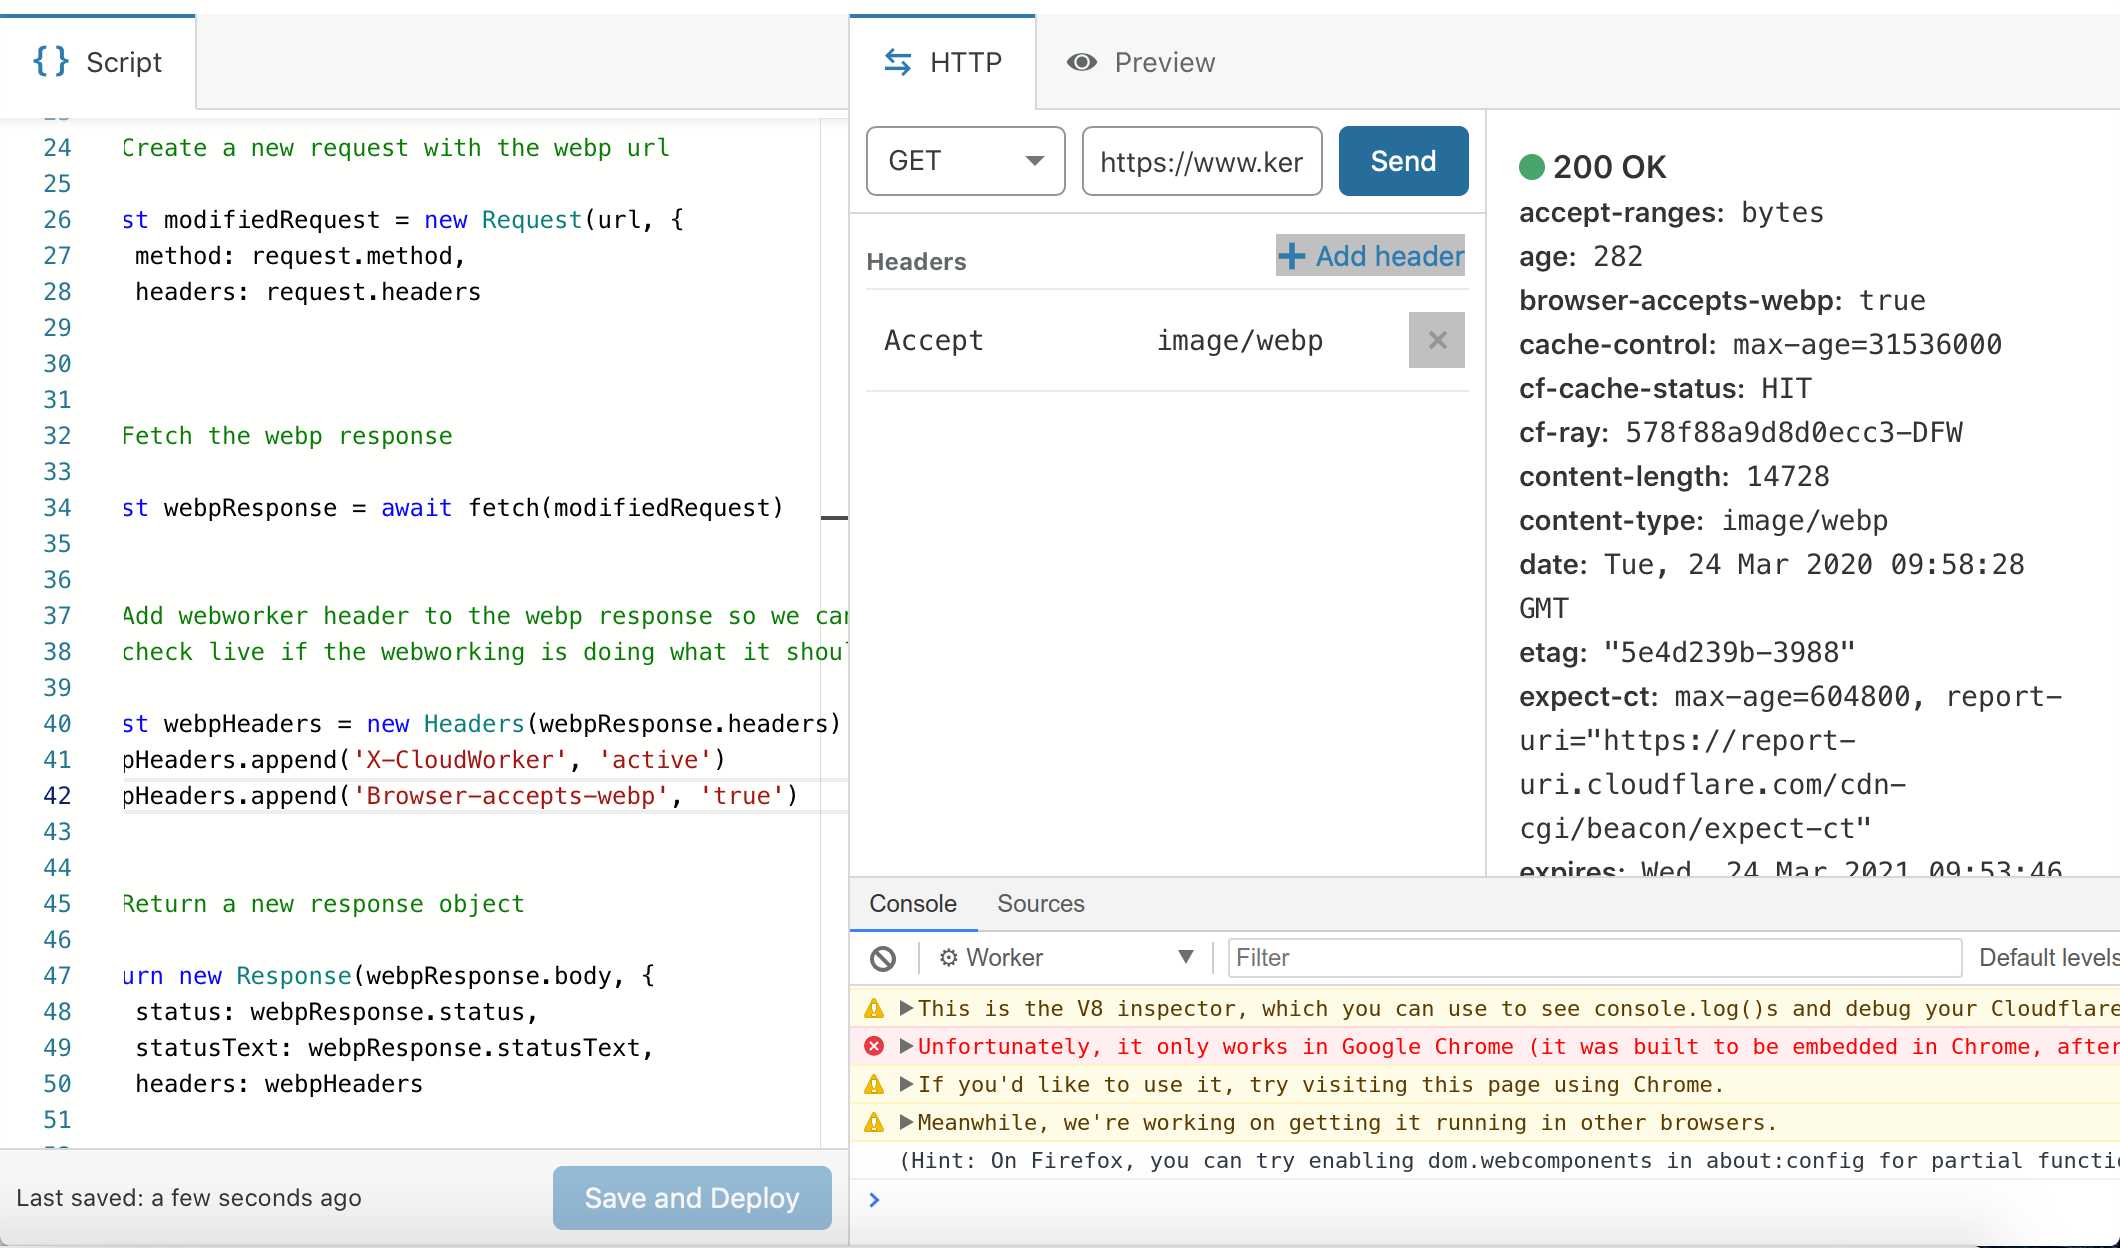
Now you just copy and paste following code snippet to the editor where it says „script“ *:
I adapted the code snippet of https://github.com/vidaxl-com/cloudflare_webworkers/blob/master/examples/webp.js which is licensed under MIT License. My adaption is ugly, but works! I may add an adapted snippet.


For non-coders here explained what the code does:
If a browser is supporting .webp: display the .webp version of the image. If not show the original uncached imaged.
Now click „Save and Deploy“ (no worries, this script is not yet being loaded anywhere on your website and CANNOT do harm to anything.)
Verifying if the Code works!
If you want to verify if everything is working as it should just enter the URL of one of your website-images in the field next to „GET“ (like https://www.example.com/wp-content/image1.jpg ), click on „add header“, write „Accept“ in the first field and „image/webp“ in the second.
Now click „Send“. It should respond with „200 OK“ and underneath you should see a text saying „browser-accepts-webp: true“, if not click „SEND“ again (it may be that the first request isn’t cached). After the second time you clicked „SEND“ you should see „cf-cache-status: HIT“ in the response which means: this image is a cached .webp image.

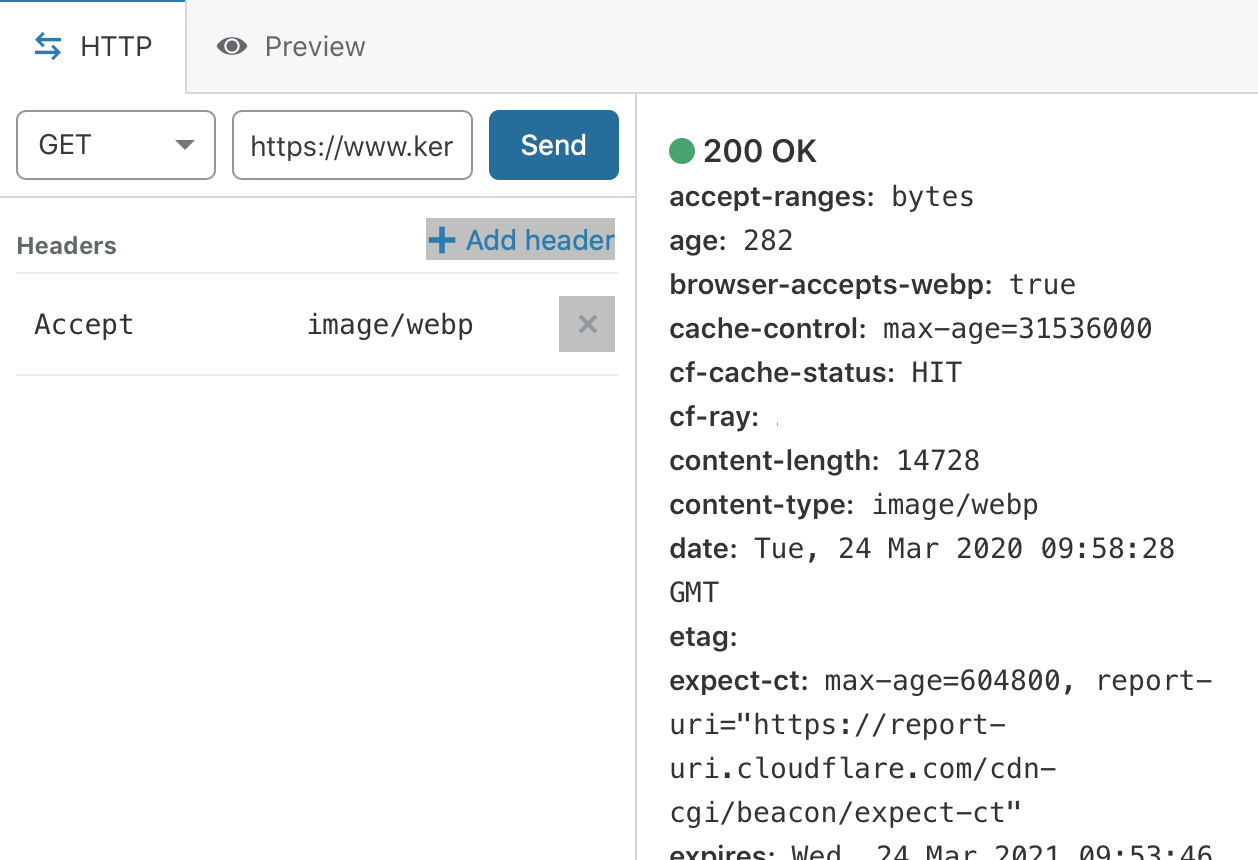
Now we change the field next to „Accept“ which says „image/webp“ to „txt“ and click „send“ again. Now you should see a “200 OK” response and „browser-accepts-webp:false“ also „cf-cache-status YNAMIC“ and „content-type:image/jpeg“ (if it is a .jpg image you are opening) which means this image is not being cached but it is fetching the original version.
If you made it to this point you are NEARLY DONE!
Publishing the script on your live website
Now we only need to run this script on your live website. Meaning: we need to tell Cloudflare that every time someone is visiting your website it should run this script.
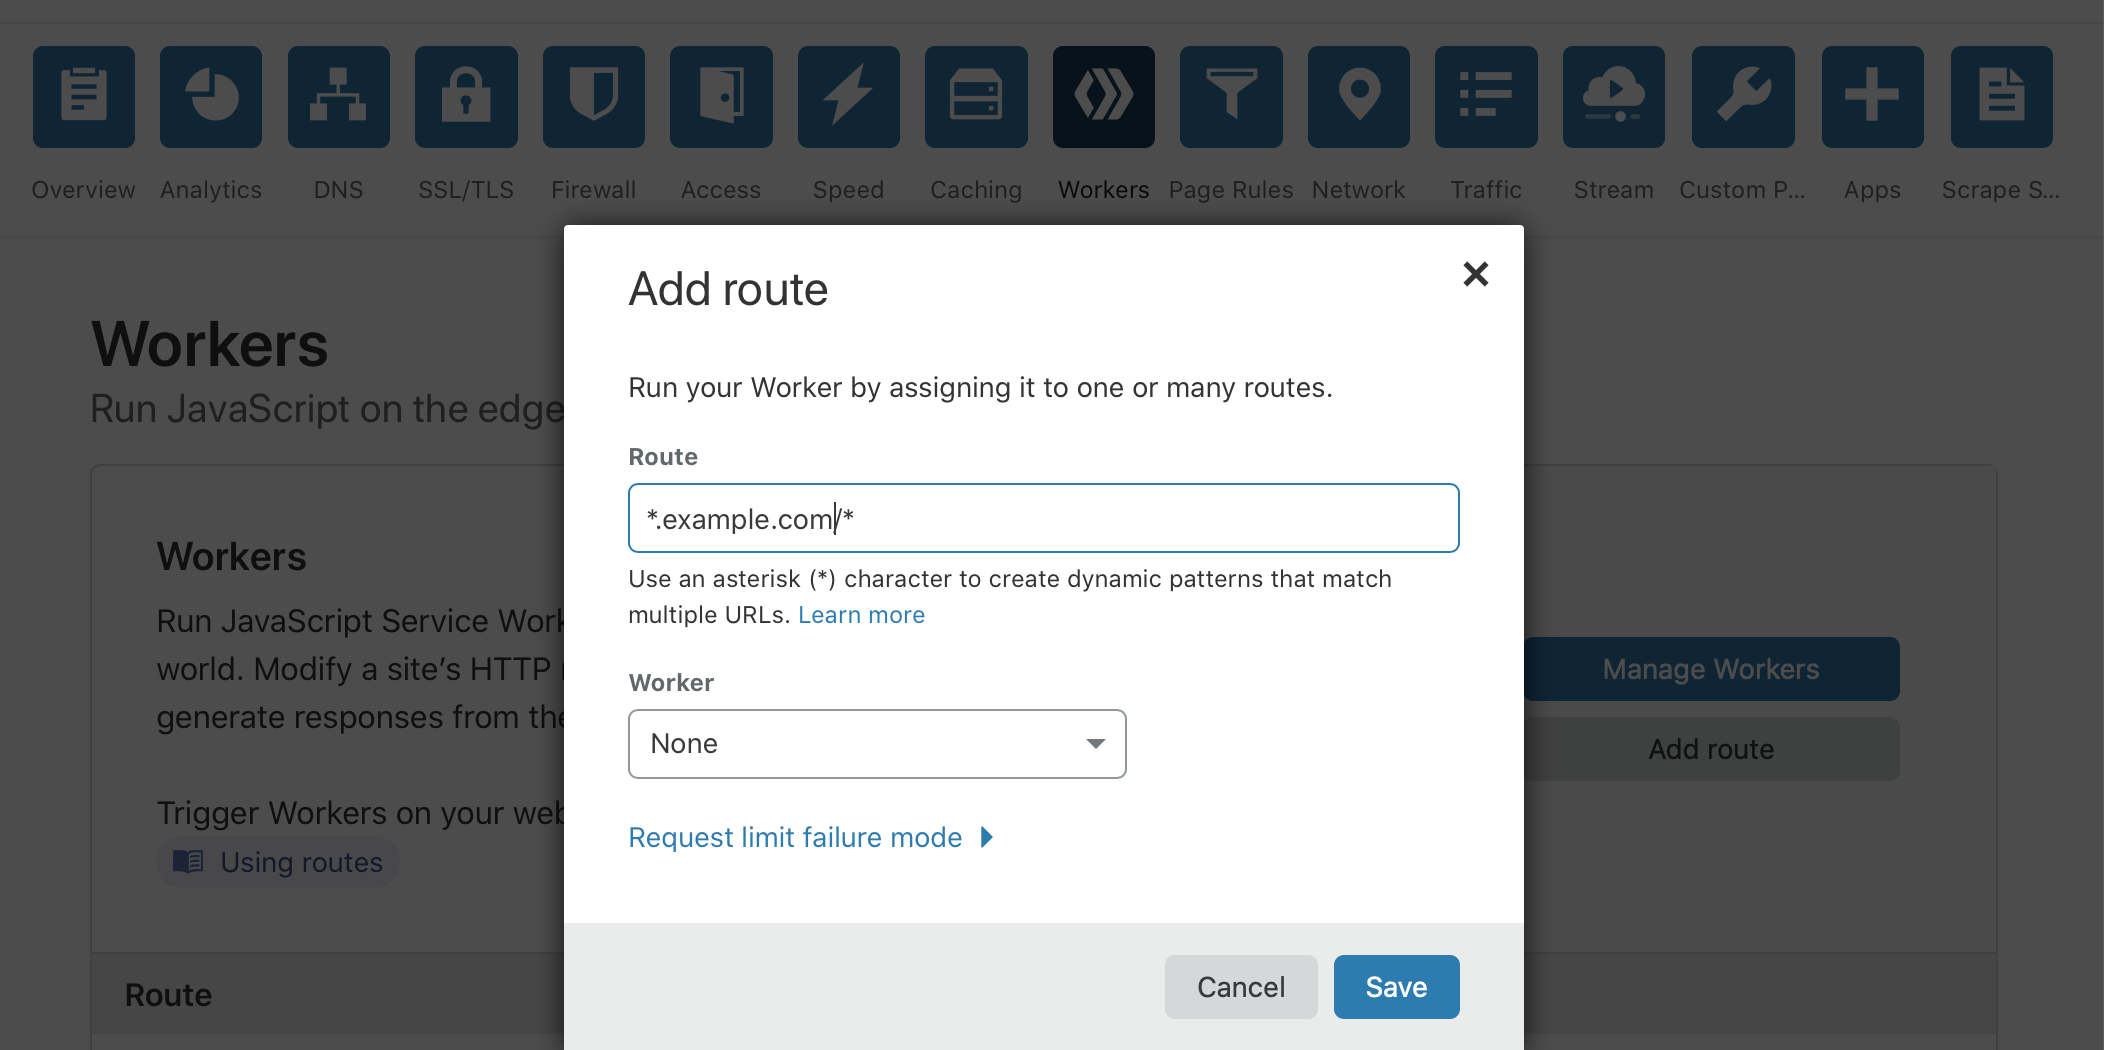
We do this by going to the workers site again and click on „Add route“ and type in „*.your-website/*“ (again replace with your site and do not miss the stars and points) under „worker“ select the worker you just created under „Request limit failure mode“ select Fail open (proceed). Now click save.

 Simple
2. On Cloudflare’s dashboard click on page rules -> create page rule -> for the URL enter: *.your-site.com/*?*nocache=true (ONLY EDIT „your-site.com“, be aware of the points and stars, otherwise it won’t work)-> add a setting „Cache Level“ to „bypass“ -> add another setting „Origin Cache Control“ to „ON“ -> click on save


3. If you never created a worker before click on the Cloudflare logo (or visit https://dash.cloudflare.com/ ) and on the right side you find „WORKERS Build server less applications“ click on it and you will need to go through a setup process.


The „workers.dev“ URL doesn’t matter, you can name this worker whatever you feel like. Now you should see a screen like this. (IF not please comment below and I will rewrite this part of the instruction.)


Now you just copy and paste following code snippet to the editor where it says „script“ *:
I adapted the code snippet of https://github.com/vidaxl-com/cloudflare_webworkers/blob/master/examples/webp.js which is licensed under MIT License. My adaption is ugly, but works! I may add an adapted snippet.


For non-coders here explained what the code does:
If a browser is supporting .webp: display the .webp version of the image. If not show the original uncached imaged.
Now click „Save and Deploy“ (no worries, this script is not yet being loaded anywhere on your website and CANNOT do harm to anything.)
Verifying if the Code works!
If you want to verify if everything is working as it should just enter the URL of one of your website-images in the field next to „GET“ (like https://www.example.com/wp-content/image1.jpg ), click on „add header“, write „Accept“ in the first field and „image/webp“ in the second.
Now click „Send“. It should respond with „200 OK“ and underneath you should see a text saying „browser-accepts-webp: true“, if not click „SEND“ again (it may be that the first request isn’t cached). After the second time you clicked „SEND“ you should see „cf-cache-status: HIT“ in the response which means: this image is a cached .webp image.


Now we change the field next to „Accept“ which says „image/webp“ to „txt“ and click „send“ again. Now you should see a “200 OK” response and „browser-accepts-webp:false“ also „cf-cache-status
If you made it to this point you are NEARLY DONE!
Publishing the script on your live website
Now we only need to run this script on your live website. Meaning: we need to tell Cloudflare that every time someone is visiting your website it should run this script.
We do this by going to the workers site again and click on „Add route“ and type in „*.your-website/*“ (again replace with your site and do not miss the stars and points) under „worker“ select the worker you just created under „Request limit failure mode“ select Fail open (proceed). Now click save.


